Are your Philodendron Birkin’s leaves turning yellow, and you’re worried about losing the plant you invested in? Or maybe you’ve noticed mysterious spots on the leaves, leaving you frustrated and confused? You’re not alone—many plant parents face these issues, and it can feel overwhelming. But don’t worry! This guide is here to help you diagnose the problems, provide easy solutions, and give you the confidence to care for your Philodendron Birkin like a pro. Let’s bring your plant back to life and keep it thriving!
Why Philodendron Birkin Leaves Can Be Tricky to Maintain
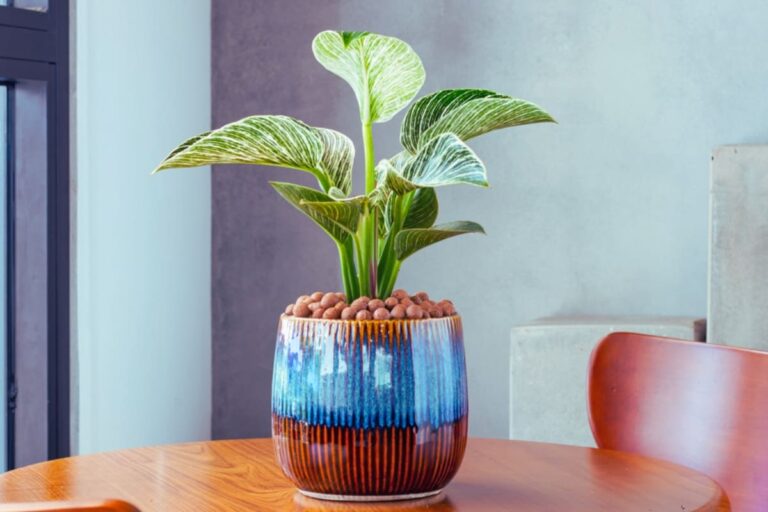
Your Philodendron Birkin is more than just a plant—it’s a source of pride and joy. But those stunning variegated leaves can be tricky to maintain, and seeing them turn yellow or develop spots can feel frustrating. Don’t worry; every plant parent faces these challenges. Here’s why:
Water Sensitivity: Overwatering causes root rot; underwatering leads to curling. Water when the top inch of soil is dry.
Light Needs: Too little light fades variegation; too much sun scorches leaves. Bright, indirect light is ideal.
Humidity: Low humidity causes brown edges. Use a humidifier or pebble tray.
Pests: Spider mites and mealybugs damage leaves. Treat with neem oil or insecticidal soap.
Nutrients: Variegation requires balanced feeding. Fertilize every 4-6 weeks in growing season.
Nominated leaf Problems Faced by Birkin Lovers
Yellow Leaves
You’ve been swamped with office work for days, barely finding time to check on your plants. One evening, you notice your Philodendron Birkin’s leaves turning yellow. Panic sets in—what went wrong?
How to Save Your Philodendron Birkin from Yellowing Leaves?
Overwatering: Check if the soil is soggy. Let it dry out completely before watering again.
Underwatering: If the soil is bone dry, give it a thorough drink and maintain a consistent watering schedule.
Nutrient Deficiency: Feed the plant with a balanced liquid fertilizer every 4-6 weeks during the growing season.
Natural Aging: Trim yellow lower leaves to encourage new growth.
Brown Tips and Edges
You’ve been diligent about watering your Birkin, but the leaf tips are turning brown and crispy. You’re left wondering if you’re doing something wrong.
How to Fix Brown Tips on Your Philodendron Birkin?
Low Humidity: Increase humidity with a humidifier or pebble tray.
Tap Water Issues: Use filtered or distilled water to avoid fluoride and chlorine buildup.
Over-Fertilizing: Flush the soil with water to remove excess salts and reduce fertilizer frequency.
Curling Leaves
You return from a weekend trip to find your Birkin’s leaves curling inward. You’re confused—did you underwater it, or is something else going on?
How to Uncurl Your Philodendron Birkin’s Leaves?
Underwatering: Water the plant thoroughly and ensure the soil stays slightly moist.
Pests: Check for spider mites or aphids. Treat with neem oil or insecticidal soap.
Low Humidity: Increase humidity levels around the plant.
Leaf Spots
You notice unsightly brown or black spots on your Birkin’s leaves. You’re worried—is it a disease, or did you accidentally harm the plant?
How to Treat and Prevent Leaf Spots on Your Philodendron Birkin?
Fungal/Bacterial Issues: Remove affected leaves and treat with a fungicide. Avoid wetting the leaves during watering.
Sunburn: Move the plant away from direct sunlight to a spot with bright, indirect light.
Poor Air Circulation: Ensure the plant has adequate airflow to prevent moisture buildup.
Leaves Drooping
Your Birkin looked fine yesterday, but today it’s drooping dramatically. You’re worried it might be dying.
How to Revive a Drooping Philodendron Birkin?
Overwatering: Check for root rot. Trim damaged roots and repot in fresh, well-draining soil.
Underwatering: Water the plant thoroughly and ensure consistent moisture.
Shock from Environment: Keep the plant in a stable environment, away from drafts or sudden temperature changes.
Loss of Variegation
Your Birkin’s once-vibrant white stripes are fading, and the leaves are turning mostly green. You’re disappointed—what happened to its unique beauty?
How to Bring Back Your Philodendron Birkin’s Variegation?
Insufficient Light: Move the plant to a brighter spot with indirect sunlight.
Too Much Direct Sun: Avoid harsh sunlight, which can scorch the leaves and reduce variegation.
Nutrient Imbalance: Use a balanced fertilizer to support healthy growth and variegation.
Common Pests Affecting Philodendron Birkin
You’re admiring your Philodendron Birkin one evening when you notice tiny webs under the leaves and small, moving dots. Panic sets in—your plant has been invaded by spider mites! You’re worried about how to save your beloved Birkin.
1. Spider Mites
Signs: Tiny webs under leaves, yellow speckling, and leaf curling.
Solution:
Wipe the leaves with a damp cloth to remove mites.
Spray the plant with neem oil or insecticidal soap.
Increase humidity, as spider mites thrive in dry conditions.
2. Mealybugs
Signs: White, cotton-like clusters on stems and leaf joints.
Solution:
Dab the bugs with a cotton swab dipped in rubbing alcohol.
Spray the plant with neem oil or insecticidal soap.
Isolate the plant to prevent spreading to others.
3. Aphids
Signs: Small green or black bugs on new growth, sticky residue on leaves.
Solution:
Rinse the plant under a gentle stream of water to dislodge aphids.
Apply neem oil or insecticidal soap to affected areas.
Introduce natural predators like ladybugs, if possible.
4. Scale Insects
Signs: Brown or tan bumps on stems and leaves, sticky residue.
Solution:
Scrape off the scales with a soft brush or cloth.
Treat the plant with neem oil or horticultural oil.
Repeat treatment weekly until the infestation is gone.
5. Fungus Gnats
Signs: Tiny black flies around the soil, larvae in the potting mix.
Solution:
Let the soil dry out between waterings to kill larvae.
Use yellow sticky traps to catch adult gnats.
Apply a soil drench with neem oil or beneficial nematodes.
How to Revive a Dying Philodendron Birkin
You’ve been away for a week, and when you return, your Philodendron Birkin looks lifeless—drooping leaves, yellowing, and dry soil. Your heart sinks as you wonder if it’s too late to save your beloved plant.
1. Assess the Problem
Check the Soil: Is it bone dry or soggy? Dry soil means underwatering; soggy soil indicates overwatering.
Inspect the Leaves: Yellow leaves often point to overwatering, while brown, crispy edges suggest underwatering or low humidity.
Look for Pests: Check under leaves and stems for spider mites, mealybugs, or other pests.
2. Fix Watering Issues
If Overwatered:
Stop watering immediately.
Remove the plant from its pot and inspect the roots. Trim any black, mushy roots (root rot).
Repot in fresh, well-draining soil and a pot with drainage holes.
If Underwatered:
Give the plant a thorough soak. Let water drain out completely.
Trim any dead or crispy leaves to redirect energy to healthy growth.
3. Improve Light and Humidity
Light: Move the plant to a spot with bright, indirect light. Avoid direct sun, which can scorch the leaves.
Humidity: Increase humidity with a humidifier, pebble tray, or by grouping it with other plants.
4. Treat for Pests (If Present)
Spider Mites/Mealybugs/Aphids: Wipe leaves with a damp cloth and treat with neem oil or insecticidal soap.
Fungus Gnats: Let the soil dry out and use sticky traps to catch adult gnats.
5. Prune and Clean the Plant
Trim dead or yellowing leaves to encourage new growth.
Wipe the remaining leaves with a damp cloth to remove dust and improve photosynthesis.
6. Feed the Plant
Once the plant shows signs of recovery (new growth), feed it with a balanced liquid fertilizer every 4-6 weeks during the growing season.
7. Be Patient
Recovery takes time. Keep the plant in a stable environment with consistent care, and avoid overhandling it.
Preventative Tips for the Future
Water Wisely: Let the top inch of soil dry out before watering.
Monitor Light: Ensure the plant gets bright, indirect light.
Boost Humidity: Maintain moderate to high humidity levels.
Inspect Regularly: Check for pests and signs of stress weekly.
Frequently Asked Questions (FAQs)
If the soil is too wet, roots may rot, leading to leaf loss. If it’s too dry, the plant becomes stressed. Maintain moderate humidity (40-60%) and water only when the top inch of soil is dry.
Underwatered plants wilt because they lack moisture, while overwatered plants wilt due to root rot. Ensure proper drainage and water only when the top inch of soil feels dry.
Yellow leaves often indicate overwatering, while brown tips suggest low humidity. Curling leaves may signal underwatering or pests, and leaf spots are usually fungal. Address each issue with proper care adjustments.
Overwatering suffocates roots, causing them to rot and leaves to turn brown and mushy. Let the soil dry out, trim damaged roots, and repot in well-draining soil to save your plant.
Start by removing dead or yellow leaves to redirect energy. Inspect roots for rot, trim if necessary, and repot in fresh, well-draining soil. Place the plant in bright, indirect light and water sparingly until it recovers.
Regular pruning encourages new growth and branching. Ensure the plant gets enough light (but not direct sun) and feed it with a balanced fertilizer during spring and summer for lush, bushy foliage.